
When real estate professionals decide it’s time to create a website for their business, they usually envision a site with IDX capabilities or active listings in the area. It’s common for agents to use a real estate website builder with IDX to get the job done, but building your own IDX website is ideal if you want the maximum customization and control. This guide will teach you exactly how to create an IDX real estate website in just a few hours.
Of course, if any of this gives you a headache or you just want help from the pros, Placester is a code-free website builder starting at just $23 per month.
What’s an IDX Website?
The simplest explanation of IDX (short for Internet Data Exchange) is the backend computer connection that allows real estate agents or brokers to display active listings on their website. IDX providers take the raw listing data from your local MLS and send it to the hundreds (or thousands) of real estate websites with permission to do so. When a listing is posted or updated on the MLS, it’s updated automatically on all the IDX real estate websites through this technology.
This update means an IDX website has listings nearly as fresh as your MLS website. The benefit of having a real estate website with IDX is huge for realtors because you can attract leads and clients to your website instead of the big real estate portals like Zillow or Realtor.com.

For a more in-depth guide on how it all works, visit What Is IDX in Real Estate? The Complete Guide for Agents.
How to Build an IDX Website Step-by-Step
Now that you understand how IDX websites work, let’s discuss creating one. There are multiple ways to build a website with IDX, like coding it yourself, using a content management system (CMS) like WordPress or Joomla, or using a real estate website builder with IDX.

Note:
WordPress is far and away the most popular CMS and has the most tutorials, support, updates, and the ability to customize your website. This tutorial will cover building a WordPress site with IDX because it’s the most popular option.
Step 1: Plan Your Website
The most critical step of building a solid real estate website is planning—it’s also the most skipped and avoided step for agents! You might think your website will be easy to plan or rely on a website template, but you’d be surprised at what you can forget until you’re halfway done.
Take some time to write out what you want from your IDX website. Research other websites you like and would like to emulate. Think about the features those websites have that you want to have on your site.
Consider the following:
- General aesthetic: The website should communicate your real estate brand with the right colors, logos, and overall functionality
- Map search: Allow users to choose a position on the map to view current listings
- Video backgrounds: This adds a dynamic element to any website; you can show yourself in a property or videos of homes for sale
- Blogs: Having local real estate content goes a long way to build authority with viewers
- Image sliders: Show a variety of listing photos or brand photos of yourself with manual or automatic slideshows
- Lead capture: How do you plan to convert site visitors into leads? Consider what type of form you want on your website and the ideal locations for them
- Home valuation pages: This is a landing page where visitors can get an idea of how to price their home
- Pop-ups: These windows appear on your site after a certain amount of time or when they are going to exit your site
- Site navigation: Make sure it’s easy for users to browse your site with a top or bottom menu and clear labels for your pages
You may already have an idea of what you want on your IDX website, but it’s smart to look at a variety of other sites for more inspiration. Think about what you like and don’t like about other real estate websites, and get specific! Write down your thoughts about the design, photos, layout, and language of each. Start by looking at the real estate agent websites we’ve gathered below.
The Jills Zeder website has a beautiful home page with an ideal menu for almost any local real estate buyer or seller. The top menu is simple, but each option offers even more landing pages for specific viewers, like those relocating to the area or those wanting particular details on the broker’s sale numbers. By having such clear menus and a variety of valuable content on their website, the Jills Zeder Group can successfully funnel their leads to the best place.
Plus, this website was built with Agent Image, one of the industry’s best real estate website builders. Learn more about how Agent Image can help you create a stunning website today.

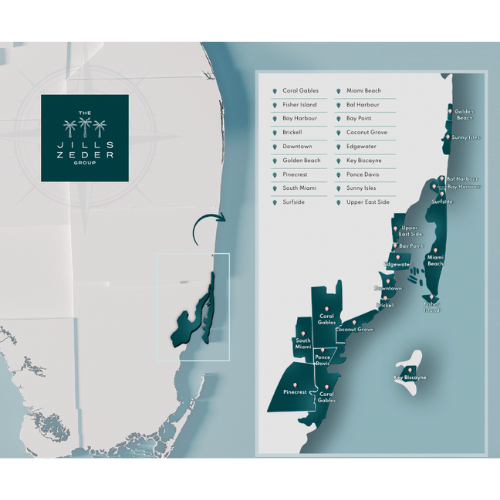
Jills Zeder’s website and neighborhood guides (Source: Agent Image)
Jills Zeder’s website and neighborhood guides (Source: Agent Image)
The Platinum Group has a dynamic home page with a listing search bar on top. There are also four buttons in the center of the home page for each type of client they’re targeting and their lead magnets: a market report and a home valuation. Another thing we love about their website is the community page options on the home page. Their website visitors barely have to scroll before seeing the different counties in the area, which shows that The Platinum Group has an extensive library of valuable content for clients to reference.
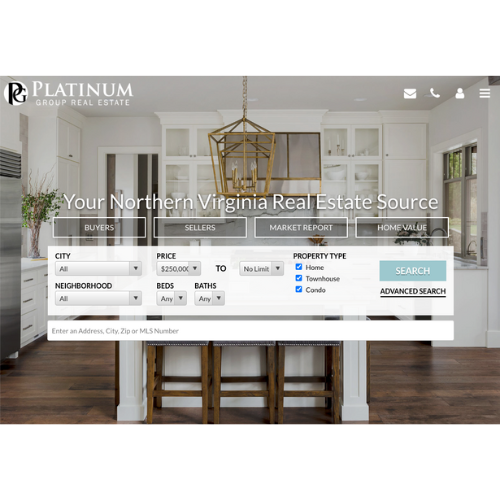
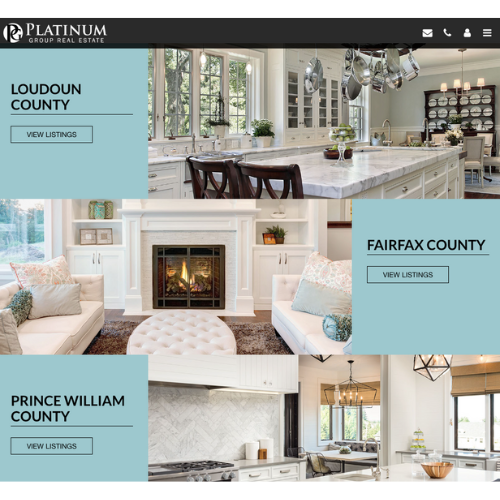
Real estate homepage and communities (Source: Platinum Group Real Estate)
Real estate homepage and communities (Source: Platinum Group Real Estate)
Most real estate websites have a listings search or call to action at the top of the home page, which can be a great strategy. However, the Donna Kerr team stands out because they don’t have that as the center of their home page. Instead, their call to action says, “Let’s talk!” which shows how much they value relationships. Their home page is also organized into three main categories with specialized landing pages for each; “buy smart” (for buyers), “sell for more” (for sellers), and “enjoy a seamless process,” which gives more details about their unique services.
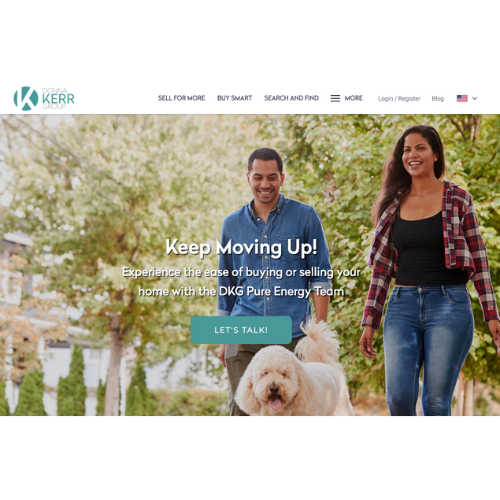
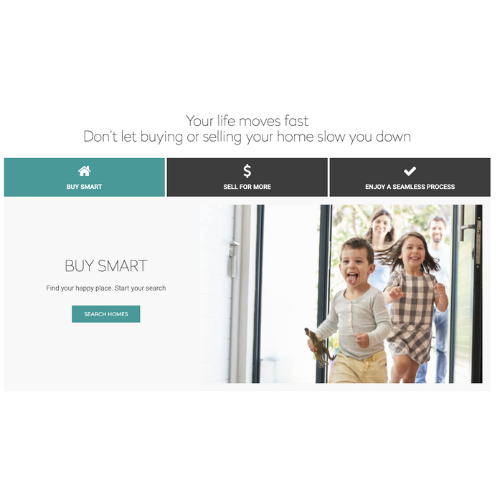
Unique real estate website home page (Source: Donna Kerr Group)
Unique real estate website home page (Source: Donna Kerr Group)
Step 2: Choose a Web Hosting Company
Now it’s time to get a little bit technical, find website hosting, and choose a domain name. Website hosting is simply the home of your website, ensuring that it loads quickly and reliably from any device.

For WordPress IDX websites, Bluehost is pretty hard to beat. Starting at less than $3 per month, it is incredibly affordable. It has a tool that lets you install WordPress with the click of a button. You also get five email addresses for you and your team, all for less than the price of a cup of coffee.
Step 3: Select a Domain Name
The domain name is the URL of your website, like corcoran.com or serhant.com. Luckily, choosing a great domain name is pretty straightforward. Just make sure it’s memorable, short enough to yell across a crowded restaurant, and matches your name or personal brand.
Using a .com is better than the alternatives, but if you have the perfect name and it’s not available as a .com, then, by all means, go for a different top-level domain (TLD) like .net, .bix, and so on. Read more tips on choosing your domain name in our detailed guide.
Generally, your website host will allow you to purchase your domain name, but you can also buy it from a separate company if you choose. You can pay as little as $5 to $10 a year to secure your URL, but shorter domain names and more popular TLDs may cost you more. Some hosting sites include the domain for free when you buy hosting.

Pro Tip: Unless you think you’ll spend your entire career at your current brokerage, avoiding including your brokerage name in your domain name is probably best. After all, you’re an independent contractor, right? Be independent.
Step 4: Install WordPress on Your Domain
Now that you have a fresh new domain and host, the next step to building an IDX website for realtors is to install WordPress. Since WordPress is open-source, it’s free! To install WordPress on your Bluehost account, log in to your Bluehost Panel, click on the Website section, and click “Install WordPress.”

Follow the prompts to connect to WordPress.com and create an account. Congratulations!  You now have your very own WordPress website ready to rock! Pretty easy, right? Now that you have your WordPress up and running with your host, let’s move on to making your website look great and adding IDX capabilities to get MLS listings on your site.
Step 5: Choose an IDX Plugin

When you build an IDX website with WordPress, using a plugin is the best way to incorporate IDX listings. A plugin is an add-on tool in WordPress that you use to change how your WordPress theme looks or behaves.
There are many options, so your decision will come down to price, features, and compatibility. Generally, you’ll pay between $50 and $99 monthly for an IDX plugin. This price is relatively affordable compared with other real estate website builders. Plus, most IDX providers offer much more than just a simple connection between your MLS and your website, so the cost is well worth it.
Here are a few of our top choices:
| IDX Provider | Pricing | Free Trial | Setup Fee |
|---|---|---|---|
| Showcase IDX | $84.95 per month | 10-day trial | None |
| iHomefinder | $150 per month | 30-day trial | $100 |
| IDX Broker | $55 per month | None | $100 |
| MLS Import | $49 per month | 30-day trial | None |
| Realtyna | Free or $199 one-time fee | None | None |
Step 6: Choose & Install Your WordPress Theme

Now it’s time to pick a WordPress theme that looks amazing, provides the features you want, and can work with your chosen IDX provider. The WordPress theme you choose controls how your website looks and acts. Themes include templates from page layout and headers to fonts, colors, and backgrounds—even lead capture and other advanced features.
Unlike your IDX provider, you don’t have to pay a monthly fee for your WordPress theme. Some themes are free; others can run from $20 to $99. Plenty of themes are available in the WordPress library, but you can also look at online stores like Envato Market, Elegant Themes, and Template Monster.
Here are some tips for choosing the right website theme:
- Use the list of features you made in the planning stage and make sure the theme you want has those capabilities
- Make sure your theme is compatible with your IDX plugin
- Check if it offers enough customization options
- Consider if you need a real estate-specific theme, or if a different theme can work (sometimes general themes can be even better!)
Pro Tip: Since this is a one-time fee, I highly recommend not skimping here to save a few bucks. An extra $20 or $30 spent on your theme can make a massive difference in your website’s quality and user experience. Generally, themes you pay a little more for perform better in the long run regarding updates, widget integration, and customer support.
Step 7: Install Your IDX Plugin

Next, head to your WordPress dashboard and click on Plugins on the left-hand side menu. Go to “Installed Plugins” to check which plugins came with your new theme. Note which plugins have already been installed, then click on Add New. You can purchase some IDX plugins through WordPress or upload the plugin you purchased separately into the dashboard.
Since thousands of plugins are available for WordPress, loading up on them can be very tempting. After all, more is better, right? Well, for WordPress, the opposite can be true. Plugins can slow your site down; some don’t play nicely with others. But don’t worry; you’ll have plenty of time to find and experiment with plugins later.
Step 8: Customize Your WordPress Theme

At this point, you should have a good-looking website filled with dummy copy and stock imagery. The next step to building your IDX website is to customize the text, images, design, and layout. Your customization options will vary depending on your theme, but here are a few basic things you can change with any advanced WordPress theme:
- Demos: Most WordPress themes will come with multiple layouts called demos. These are fully finished design and layout variations, and each one will make your website look very different—even though it’s the same theme. If you want to install a demo to change how your site looks, go to your WordPress dashboard and click on Tools, then Import. Next, click on WordPress and navigate to the XML of the demo you want to install.
- Logo: Add your logo to your WordPress theme, and it should automatically appear on multiple website pages. Customize your favicon with your logo (the little picture in a tab at the top of visitors’ browsers).
- Site Navigation: The menus and navigation of your site are crucial to lead visitors to the right places. Ensure you think through your menus and test your site until you perfect the navigation and all pages.
- Footer: The footer area of your site will generally have social media links, contact information, and a sitemap, which is a list of all the pages available on your site. Like the navigation, your footer is universal and will appear on every page.
- Widgets: Widgets are small pieces of code that let you drag and drop site features like search bars, listings by price range, email capture, menus, recent articles, and many more elements onto any website page. Similar to plugins, more is not necessarily better here.
Step 9: Start Building Your Website Pages
We’re getting to the meat and potatoes now! At this point, you’ll start building the pages of your site, including informational pages and real estate landing pages designed to convert a specific type of visitor. This buildout can be time-consuming, so make sure you set time aside to work on your website until it’s ready.
Every real estate website is different, but here are a few highly recommended pages to include the following:
- About us (or an agent directory for teams and brokerages)
- Contact (with a lead capture form)
- Listings for sale
- Buyer’s guide
- Sell with us
- Home valuation landing page
- Neighborhood pages or guides
Keep in mind that pages and posts are two separate things that work very differently on a WordPress site. Pages are the main sections of your site that don’t change very often (like About Us, Contact Us, and Listings), and posts are generally part of a blog.
These articles on different topics cover anything from things to do in your neighborhood to market reports to home design tips. Publishing blog content is essential to optimize your website for search engines. For more details, read our complete guide to real estate SEO.
Here are a few more great resources for building strong real estate website content:
IDX Real Estate Website Tips to Get More Leads
Congratulations! You now have a fully functional WordPress IDX website ready to build your brand, attract visitors, and generate new leads to help you close more deals. Of course, a website is pretty useless if no one ever sees it. Here are a few of the best ways to generate traffic and turn your website into a real business-growing tool:
Promote Your IDX Website:
Your website is the most powerful tool in your arsenal to attract and convert leads. However, it’s also not a magic button—you have to put your website out there to get clicks and targeted traffic. Here are a few places you should consistently share your website:
- All of your active social media profiles (including Facebook groups)
- Your business cards and email signature
- Your real estate postcards
- Your Zillow and realtor.com profile
- Your Realtor association profiles
Offer Lead Magnets to Your Niche Audience:

The best way to turn website visitors into high-quality leads is by offering them something valuable. Start by thinking about the kind of clients and real estate niches you want to work with (i.e., buyers, sellers, expired listings, etc.). Then, create something that will benefit each of your target audiences. This can be simple, but the more specific, the better!
Here are a few ideas:
- Homebuyer’s guide
- First-time homebuyer’s guide
- Steps to buy a home in [your city or town]
- Seller’s guide
- How to maximize profits when selling your home
- How to buy and sell a home at the same time
- Reasons your home isn’t selling
- How to avoid foreclosure
- How to buy or sell a home when relocating
Test, Test, and Keep Testing New Website Strategies:
You will have to work hard to get people to visit your site and leave their contact information or reach out and call you. The first version of your website will NOT be the most successful, even if you’re a marketing expert. It is key to look at your website’s performance and continually adjust your website to make it more effective.
For WordPress websites, the best way to gather data about your website’s performance is Google Analytics and Google Search Console. Both platforms have a significant learning curve if you don’t already have marketing experience, but you need to have patience with yourself.

On the other hand, if you want to skip all the technical parts of creating a real estate IDX website, use a website builder like Placester. It’s a code-free solution to creating a beautiful, professional, and custom website. Plus, Placester provides reports and dashboards in Google Analytics and guides to help you understand the most important data. Learn more about why Placester is a great option in our detailed Placester review.
Best IDX Real Estate Website Builders
Building your own website isn’t the hardest thing you’ll do as a real estate agent, but it takes time, dedication, and both technical and marketing expertise. You’ll need to select the best plugins, choose and purchase your template, create copy, design your pages, and make sure your site is optimized to capture leads.
If DIY-ing your IDX website matches your budget and skills, this guide was built for you! But if you’d rather spend your time on other real estate-related activities, consider one of our top real estate website builders. All of them are IDX-enabled, so they ensure your site is working as hard as you are.
| Website Builder | Best for | Starting Monthly Price |
|---|---|---|
| Sierra Interactive | All-in-one sales ecosystem | $499.95 |
| Placester | Concierge service | $79 |
| AgentFire | Affordable customization | $149 |
| Agent Image | Luxury markets | Custom pricing |
| Real Geeks | Website templates | $299 |
| Squarespace | DIY design | $16 |
| iNCOM | Value | $44.99 |
Frequently Asked Questions (FAQs)
What is IDX on a website?
![]()
IDX (Internet Data Exchange) is the technology that allows realtor websites to display current listings in their area. IDX companies connect to the MLS and transfer the data to a real estate website plug. Learn more in our guide: What Is IDX in Real Estate?
What does IDX stand for?
![]()
IDX stands for Internet Data Exchange, which is the technology that allows real estate websites to show listing information from the MLS.
How much is an IDX website?
![]()
You can make an IDX website with a real estate website builder, coding it yourself, or using a CMS like WordPress with an IDX plugin. Website builders can range from about $70-500 per month, and IDX plugins range from $0-150 per month.
Bringing It All Together
Building an IDX website is a straightforward process that can be done in as little as one afternoon! DIY-ing your own website can be more challenging, so if you’d rather avoid the technical obstacles, then choosing one of the top real estate website builders could be a better choice. No matter what your strategy, having a real estate website with IDX capabilities will help you attract more website visitors and convert more leads.
The post How to Build a Real Estate IDX Website in an Afternoon appeared first on The Close.